Decorating Easter Eggs with Paper Napkins


Welcome Back!!!

It's been awhile since my last blog post, actually a year, how crazy is that?  Sometimes, life throws  some unexpected things your way and you push aside your passions for awhile. Being creative is what I love to do. So, I'm happy to be back, and hope to provide more content for you moving forward.

With everything going on in the world right now, and families looking for new craft ideas to do with their children, my daughter Mia and I thought this would be the perfect time to put together a quick and easy Easter egg craft. Easter will be here fast, so we need to get a HOP on some ideas now !


   Today, we will be decorating Easter eggs with paper napkins.


ITEMS YOU WILL NEED:

1.  Paper Napkins with any design ( Favorite character, floral, plaid, etc.)

2.  Eggs ( white or beige work best) Plastic, Wooden, or Hard boiled 

3.  Scissors  

4. Small paint brush 

5. MOD PODGE or watered down Elmer's glue

6.  Egg carton or Cooling rack


STEP : 1 

Cut your napkins into small pieces. 


With Floral or Characters cut around the outer edge.


STEP: 2

Use your paint brush to apply Mog podge or Glue to your egg one spot at a time. 


STEP: 3

Add your cut napkin pieces one at a time and more Mog Podge or glue to the top, repeat steps 2 and 3 until your egg is covered. 


STEP: 4

After your egg is complete, you can use an egg carton or cooling rack to place your finished eggs on to dry. Drying time should only take a few hours.


STEP: 5

Add them to a basket, a bowl, decorate your mantel or use them on your table at Easter. They would also make a great gift.


I hope you enjoyed making these today, I know my daughter Mia and I had fun making them and putting this Blog post together.

Please stay safe and healthy, enjoy this time with your family and have a wonderful Easter!


                                                                        xoxo  
                                                                                         Amanda & Mia

Fun Filled Easter


Spring has finally arrived!!! I'm so excited for the warmer weather and to see the tulips starting to peak out. With Easter right around the corner, I wanted to put together a Kids Easter tablescape. This is one of our daughter's favorite holidays, and what a better way to celebrate than having the kids' table feel so special?


I started off with this lovely pink fabric I had used previously as the table runner in my Valentine's tablescape, I like to reuse and save money anyway I can. Next, I added this beautiful lace table runner that I've had for many years. It was the perfect soft touch I was looking for.


The scalloped edge detail on the runner is so beautiful.


For my centerpiece I added these pink faux tulips, I love how realistic they look. 


For the place setting I added some soft pink plastic plates and topped it off with these adorable bunny plates that I purchased at TJmaxx. I love how well the look came together.


I wanted to think of a fun way to have place cards for the kids to find their seats at the table. I used dessert cups that I already owned, added some pink tissue paper, and used ribbon that I had on hand to write their names on. Then I simply added some green moss and these colorful polka dot eggs that I also found at TJmaxx.


How cute are these bunny ear napkin rings I found at TJmaxx? I paired them with my white linen napkins and added these colorful plaid paper napkins that I purchased at the Dollar Tree. 


To finish off my table I added speckled eggs and carrots that I also found at the Dollar Tree, and on my mini cake stands I added some delicious macaroons, the perfect yummy finishing touch.


To bring the whole room together I put together a carrot banner made with white and lace ribbon that I had and left over carrots from the Dollar Tree.  It's the perfect finishing touch. 


I am so happy with how my Kids Easter tablescape came together. I hope you enjoyed it, and inspired you to put together your own.  Wishing you a wonderful Easter.


                                                                      XOXO- Amanda


Valentine Romance


Welcome back! Today, I'm sharing my romantically styled dining room for Valentine's Day. I've always had a love for this day, it's a special time to show my loved ones how much I appreciate them. Preparing dinner and gathering around the table is a perfect way to spend this day together.


My inspiration for my Valentine's dining room came from this vintage print I picked up at an antique store last year. I fell in love with the colors and the romantic feel. 


I incorporated shades of pink, white, gold, and a touch of blue, just like in the vintage print. This color combination makes my heart happy. 

The flowered centerpiece is the focal point and I absolutely love the pedestal gold vintage style urn, which I recently treated myself to using a gift card I received on Christmas.


I wanted a delicate romantic feel to my table setting. These blue, pink and gold vintage plates that I already owned went perfectly, and I added a simply blue ribbon and heart to finish off the look.


I added a pink runner that I made from 4 yds of fabric that I purchased at Walmart for $11. I added flowers and greenery that I already had on hand and tied it with the blue ribbon.


Candles are the perfect touch to pull off a romantic feel, I have been collecting the gold candlesticks over the years that I've found at Savers or yard sales for a couple of dollars each.


I added golden hearts on my table runner and the pink water glasses that I found at Savers for $4.99 for 8, the lemons add the perfect touch of yellow to both.


We can't have a Valentine's dinner without a sweet treat, how adorable and yummy is this donut cake my daughter and I made together? Looks to good to eat!


My overall vision for my Valentine's dining room came together. I'm so happy with the way it turned out and I hope you enjoyed it as well. Thank you for stopping by, have a wonderful Valentine's day.


                                              XOXO - Amanda


Holiday Home Tour


 Welcome to my first blog post! I'm so excited to have finally started my blog. This is something I've been wanting to do for a long time, and what better way to start it off than a holiday tour?

First, let me start off by telling you a little bit about myself and my home. My name is Amanda, and I have always had a passion for decorating. I remember rearranging my bedroom as a child almost monthly, even moving the furniture by myself, which now that I think back, might have been a safety hazard. Oops!! Good thing nothing bad happened. Moving on, I have lived in many homes since then and have continued to pursue my passion for decorating, which has grown with each new home I've lived in. I didn't go to school for interior design, it's something that's just in me. Seeing my visions come to life, right before my eyes makes me so happy, it's like my therapy.

In 2013 my husband Sean and I went searching for our forever home, a place where we could raise our two children Christian and Mia. Originally we lived in Massachusetts, but decided we would try looking in New Hampshire, and after a few months we found our home. A Victorian style built in 1998, it was love at first sight for me, we just knew it was the one as soon as we saw it. We have lived in our home for 5 1/2 years now, and just love it. We have added to our family since then, adopting our golden retriever Lily, our cat Molly, and our 21 chickens which do all have names, but I will spare you from all of them.

I honestly couldn't be happier to be able to share my a passion and home with all of you. So now that I've rambled on about myself, lets get to what you all came here for.  My Holiday Home Tour, ENJOY!


My sitting room is one of my favorite places in my home. I love relaxing in there with a cup of tea in hand, or listening to my son play the piano. I wanted the decor to make me smile, and the little pink touches do just that.


       The bowl of ornaments and crown added the perfect touch to my coffee table.


 The faux mantel is my favorite piece in the room and what I love to decorate the most. I wanted it to have a soft romantic feel.
                                         
                                          Click links to shop my Sitting Room


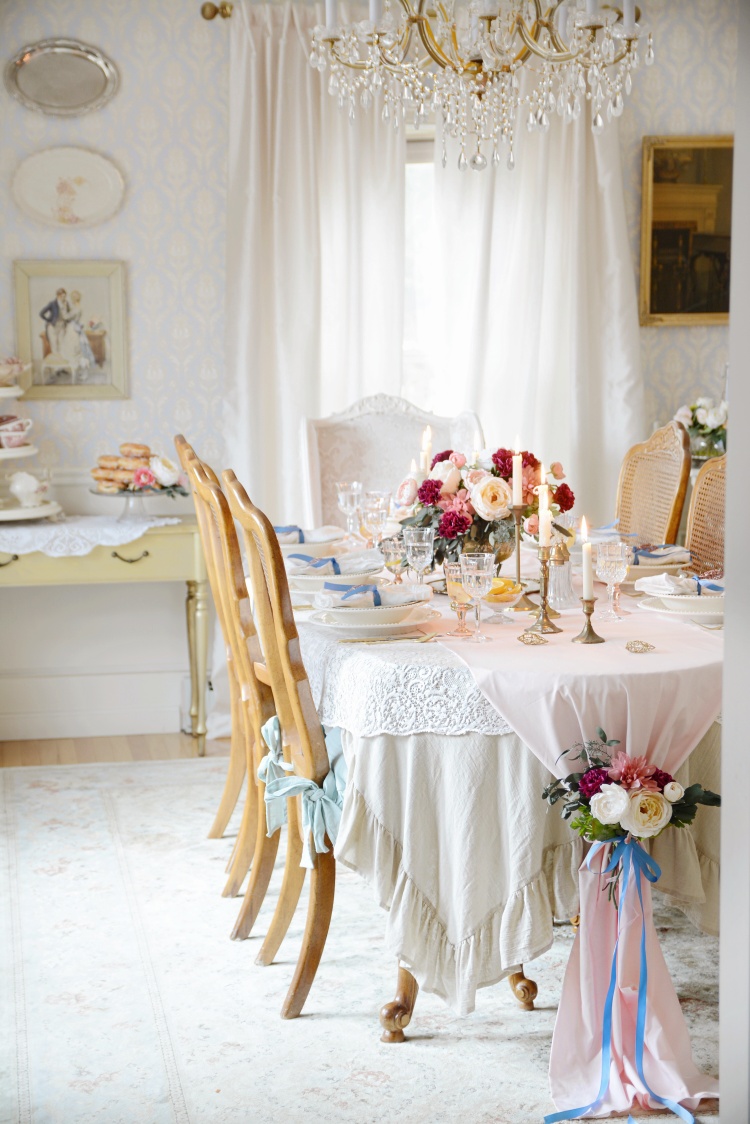
My dining room has the most beautiful light coming through the windows in the morning, it's such a welcoming feeling. I used white and warm tones to make my decor in here feel the same way. 


 The cascading greenery and roses give a soft, romantic feel to my tablescape.


The winter scene plates give the setting a cozy winter feel, and set the tone for the whole room. 


I added a quaint wrapping station, I think its adorable and it gives me all the Christmas feels.


This faux mantel is one of my favorites pieces in here, the reflection of the chandelier and tree give it a magical feel. I repeated the cascading greenery and white roses to complete the overall look of the room.

Click Links to shop my Dining room


Our Family room is the hub of the home. We spend most of our time in here, so I wanted to keep the decor simple, and our dog lily just had to show off her favorite spot.


I love the simpleness of the vignette, white houses, and bottle brush trees, they are some of my favorite items to display.

Click links to shop my family room


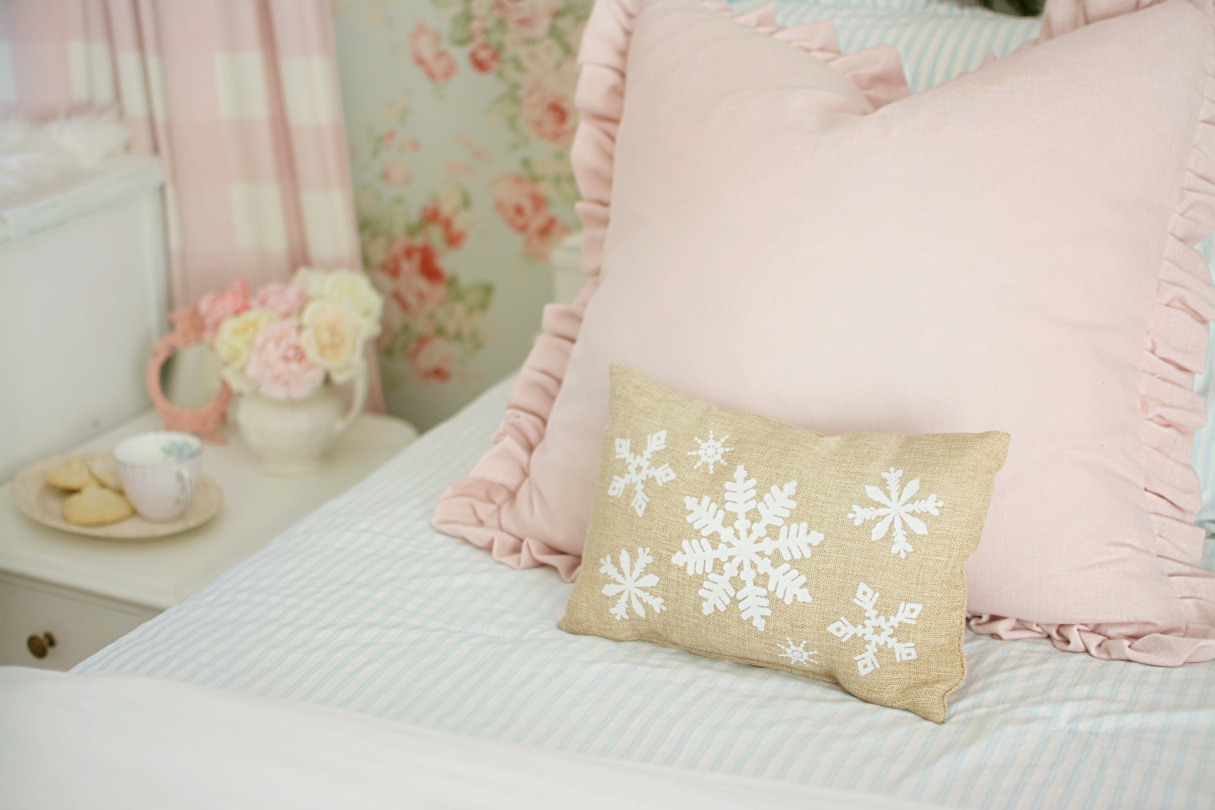
Lets head upstairs to my daughter's Christmas-themed bedroom, I wanted to keep her room simple and sweet, and bring in touches of white, blue and pink. 


I love how this vignette turned out, it reminds me of a little Christmas village. It's so sweet and girly and my daughter loves it.


I hung the wreath on her antique bed and added long blue and white lace ribbon to give it a whimsical look.


  This sweet snowflake pillow adds a winter cozy feel.


Of course, you can't forget to leave milk and cookies for Santa.


My daughters bedroom was featured in Simply Shabbilicious Magazine click to view online or buy a copy.

                                           
                                        Click links to shop my daughters bedroom

Pink Buffalo Check 96" Blackout Curtain

Abby Rose III Grand Floral Wallpaper Roll

Pink ruffle throw pillow


16" Unit Frosted Green Pine Artificial Christmas Wreath

4ft Pre-Lit Flocked Greenfield Pine Artificial Christmas Tree

Winter Snowflake Throw Pillow


Last stop on the tour is my master bedroom. I wanted a winter wonderland feel in here, where I can just cuddle up in bed with a cup of coffee and stay warm and cozy watching Christmas movies all day.


I've always wanted a white Christmas tree and I'm so glad I got one this year. I just love the soft airy look. 


My vanity is so special to me, it was a surprise gift from my husband Sean for our first wedding anniversary. In the frame is our wedding photo, the makeup mirror was my grandmothers and I found the matching comb and brush set at an antique store. I added a little touch a Christmas and I just love the reflection. 


 The round sitting nook with table is the perfect spot for brunch, I put together this whimsical tablescape for my family to enjoy on Christmas day.


 Most of the items I picked up at Savers, the little light up houses and church, green trimmed plates, cloth napkins and ribbon, with some of my own pieces I already had. It all came together for under twenty dollars.


My Christmas bedroom came together just how I envisioned.


That concludes my very first Blog Post and Holiday Home Tour, I appreciate you stopping by and hope you enjoyed it.  I look forward to sharing a lot more with you.  Have a Wonderful Holiday. 
                                                

xoxo Amanda 


Click links to Shop my Bedroom